Sanctum ophidia

Insert Stuff here
Manticora
Positions - Some groups will bring the Manticora out and fight it where they have been stood or keep it where it spawns. Additionally we taunt it to the entrance ramp and have the group gather around the bottom of the ramp so all mechs are easily seen when described.
Heavy Attack This can be lovely if you're caught off guard but block and make sure this boss is facing away from your group as a tank.
Cleave The Manticora will cleave in a cone aoe.
Quake
The wonderful mechanic that frustrates most. Where players are targeted with an expanding aoe under their feet 3 times. Those targeted can walk or roll backwards away from it if they stay calm, you can take one blow from quake but it is unlikely that you will survive all 3 so be aware and react in a timely fashion!
Stomp
The Manticora will rear up and cover the arena with an aoe, do not panic and try to outrun this! Stay calm and in the formation you've been advised by your raid lead and block. It applies a bleed but trust your healers! This mechanic happens after 2 rounds of Quake so raid leads can notify the team asap.
Portal
A green spectral figure will appear and talk, the Manticora becomes stunned and a black hole will appear on the ground. As soon as you see or hear him if the group adjust quick enough it will stop people falling down by accident. If random people fall down its completely fine too just be careful!
sidenote there are no Quake mechanics while this portal is active so groups can maximise stacking and offloading as much damage as possible during this time. The portal people can choose to drag the portal out by not rushing to kill the boss in there which gives everyone upstairs more time. Or you can kill it quickly and return to group, the cycle of mechanics and attacks will then continue.
Poison Pools
These are spears that target the people furthest away and will land and create a large aoe on the ground that spews out all sorts of death. Avoid this. Don't stand in this. Assign people the role to kite these at the back!
Angry Manti
The boss will turn red and enrage and this is a beacon to the group that it dies.... Like right now... Prolonging this portion of the fight has no advantage so try your best to get that health bar to zero ASAP!
Trash & Smash
Overchargers
If you have completed the other 2 raids in Craglorn you will have learnt these have to die first, The target players to overcharge which then puts a large aoe under the player! This does constant damage and on top of everything else this trial has to offer can be a cocktail of death.
This aoe follows the targeted player so do not stand in stack/group, just move to one side within range of the healer and keep calm.
Trolls
These can be tricky to stack for starter groups but do your best, they will slam and smash the ground like angry children, this puts out and aoe so just dont be near them as they have their tantrum. Players will also be targeted with balls of poison THIS SPREADS this mechanic can put a lot of pressure on healers in starter groups because its just constant, the poison does disappear if you give it time but if you run around and hug your friends it will spread!
sidenote DON'T be that asshat
During trash fights you want a fairly loose stack to prevent poison stacking or juicy overchargedness in the group, it gives players the space they need to react and survive.
War Priests
Banner wearer and will easily go down in cleave and aoe damage from the group, the trash list here is in priority order. If they attack you as a dd just block and head to your nearest Tank and they will remove the burden from your hands.
Stonebreaker
Your second boss and is a big troll at the end of the bridge, position wise tank can keep him where he stands and just faces him away from the group.
Stomp
Like other trolls he stomps and has an aoe around him, avoid standing in his stomp or if you get caught too close just roll back and out the way.
Stone Chucker
He will chuck stones at players, he will raise his arms up and it can be seen so keep an eye out! If you block or shield this mech itll give you the best change of survival.
Troll Tantrum
He will throw a huge tantrum and start smashing the ground, this will send out 3 lines towards the tank so be careful.
Poison This happens throughout the trial never mind fights but be careful of your position and try your best not to spread it!
Ads
There's overchargers and other banner beauts through this fight, everything goes when the troll does but if you do focus the overchargers that spawn this fight can be fairly stressfree

Ozara
This boss can either be fairly straight forward or very tricky, Ozara is a snake looking lady and is fairly low stress, however there's a door which overchargers come out of through the fight which can pose a problem.
There will be a shaman at the door which will need killing, he spawns a totem that will move the overchargers.
Pin Mechanic
Ozara will pin down 2 random players and it will take another player to stand over them and synergy the bolt out, if people ignore this the players will die.
Positions in this fight are key, usually the tank will hold Ozara near the door and grab the overchargers as they come out, with the shaman out of the way its a case of watching out for the pin mechanic and keep your distance from others so everyone can see.
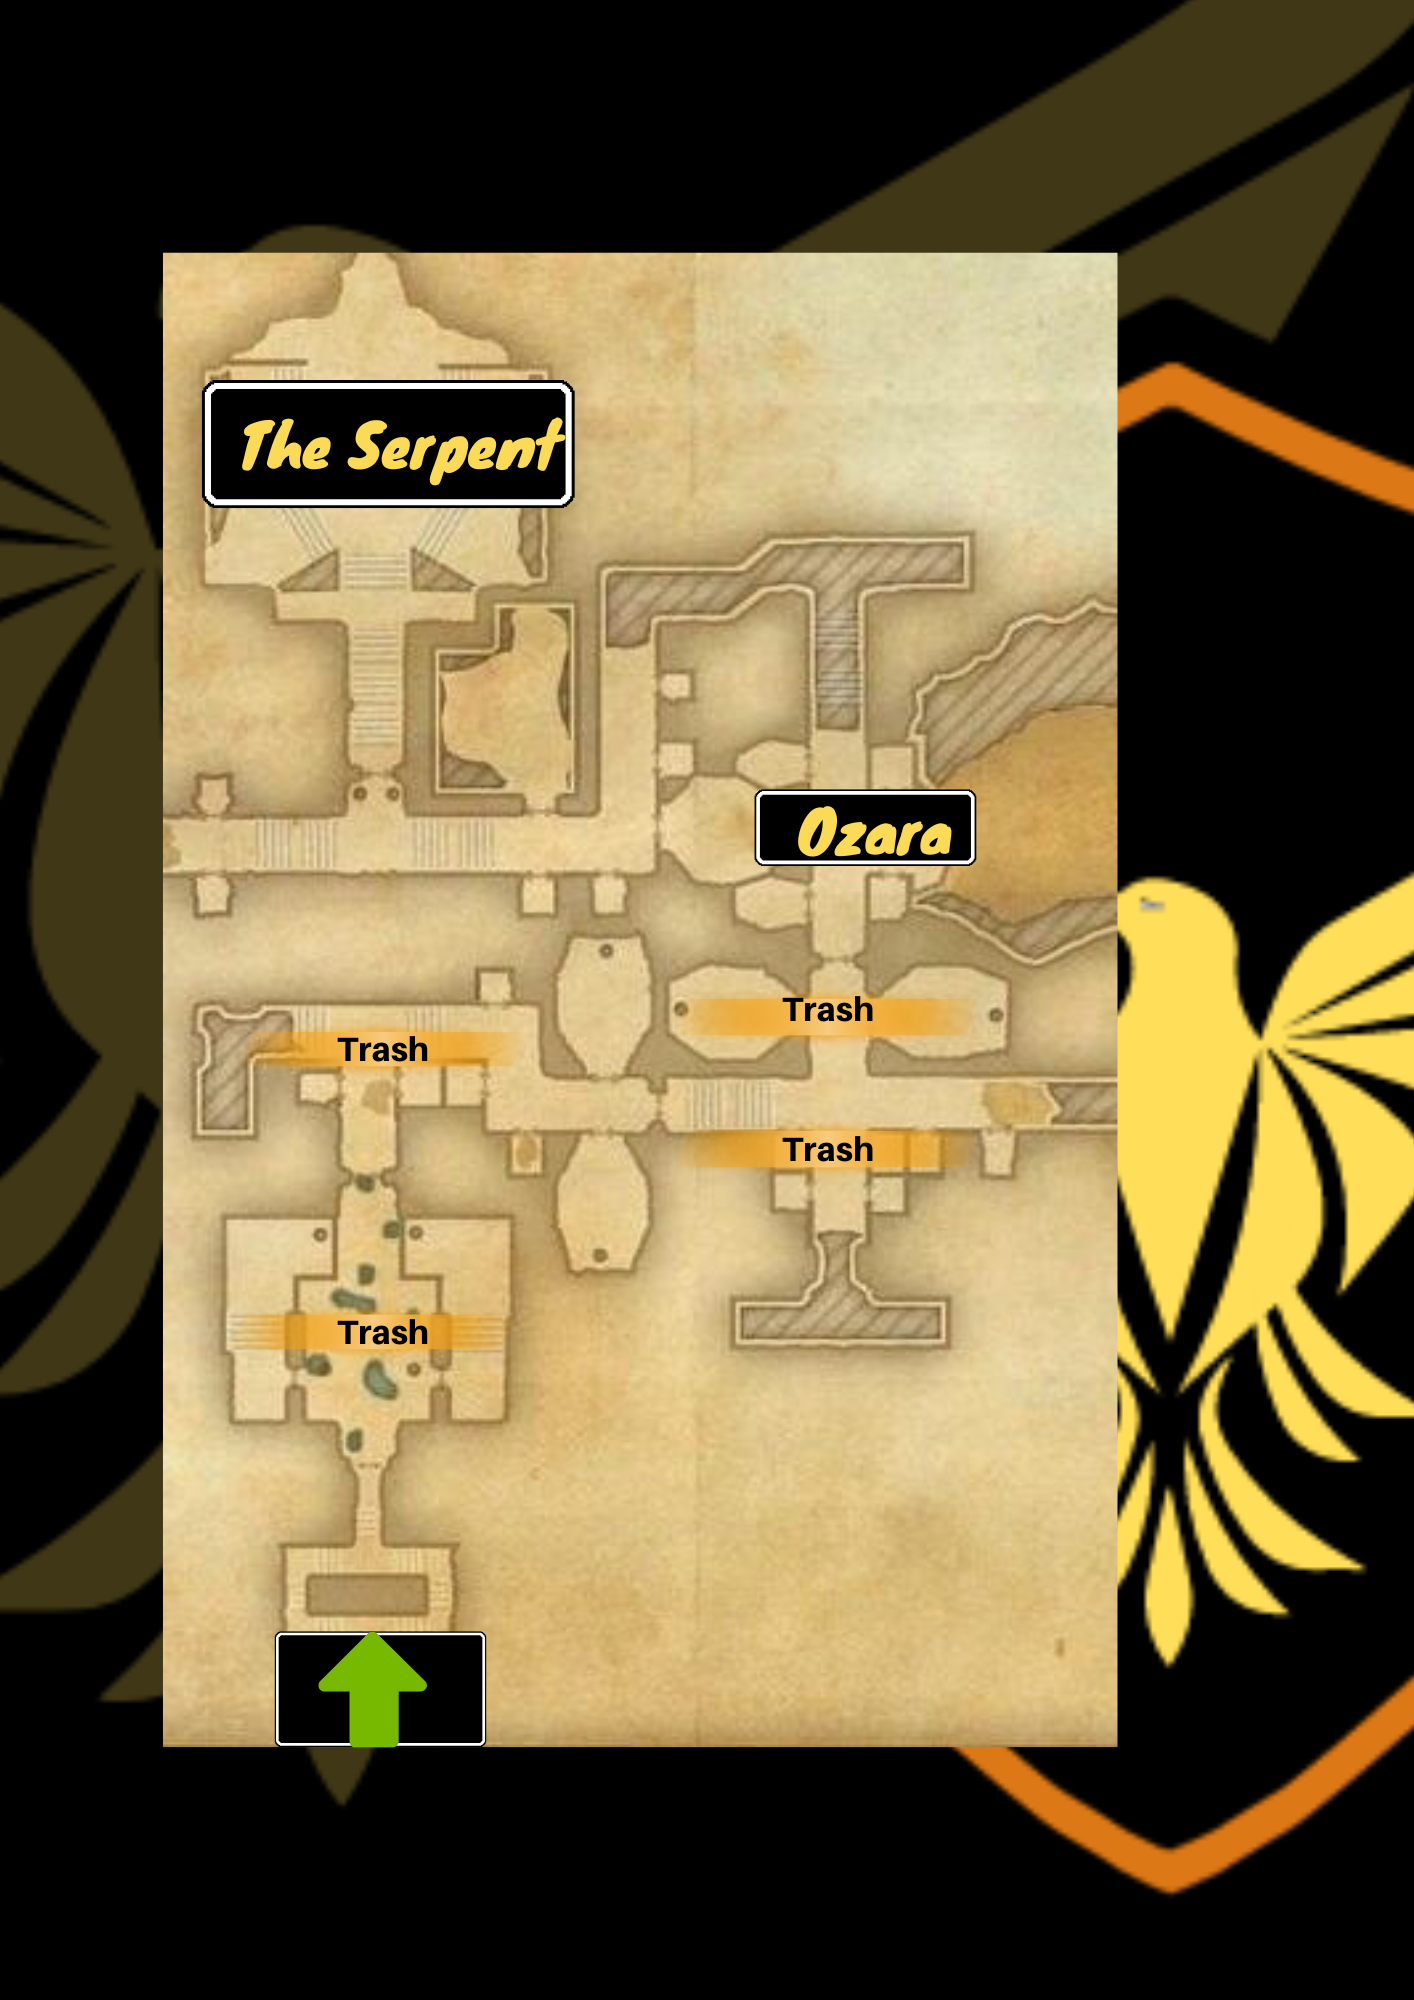
The Serpent
Before the fight - Please make sure each member of your group has the ability to dump their magicka, one of the mechanics requires you to do this should you be targeted.
MT will keep the boss on the circle platform with a tight stack behind the boss.
OT will take Lamias and mini Mantis out of the group and hold them to one side, should the tank struggle the group can just turn around and remove them. Be careful with the lamias as they will explode on death, make sure they are targeted and removed from group asap.
Poison Phase
Players will need to stack up and healers will heal the group through this phase, your screen turns green and your addon will notify you of this mechanic.
Totems
If your group damage is high enough you can burn the boss without touching a totem, if you have a training group then the totems can be a bit of a challenge, their priority kill order would be poison, blue then green.
Green Can pull a player out of stack, you will need to break free and roll dodge back to the group as quick as possible.
Blue These will put the magicka bombs on players, your addon will tell you to burn your magicka and your screen will turn a dark blue. The player will have around 10-15 seconds to burn all of their magicka (Ideally under 15%) or they will explode. If you are unable to burn it just step out of stack, its easier to res 1 person than 5 thats have been killed by a magicka bomb.
Poison This totem will make The Serpents poison phase stronger and he will do more damage to the group which can put extra pressure on supports.
Remember that once this boss reaches zero HP the group will have to continue their damage until a spectre leaves the serpent, that will conclude the fight!